

I love cute DIY wedding ideas, especially the easy stuff. Here are a few place card and table number ideas that will add that little something extra to your reception table.
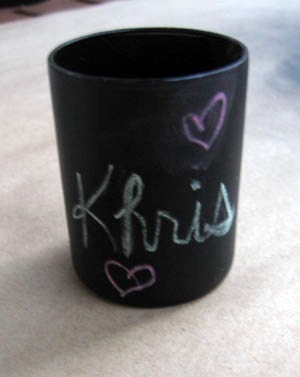
Let's start with the easiest idea first, from Khris over at DIYBride. Great website, by the way if you haven't seen it. Khris calls it the Chalkboard Votive. If you are having an informal wedding reception where fun is your main priority, these place cards may be nice for your table. Here are the directions.
Supplies Needed
- Chalkboard paint (found at craft stores and home improvement centers)
- Votive cups
- Newspaper or other covering to protect your work surface
- Well-ventilated work area (do this outside if at all possible)
- Chalk
Instructions
- Cover your work surface with newspaper.
- Wash and thoroughly dry your votive cups. This removes any gunk and fingerprints to ensure you get a nice, even coverage of paint.
- Turn the votive cups upside down on the work surface. (So you don’t spray inside the cup.)
- Spray the votives with chalkboard paint. Hold the paint can about 8″ - 12″ from the cup and spray lightly. Too much paint will leave runny marks down the side of the glass.
- Let the paint dry per manufacturer’s directions. (About an hour should do. Your time may vary.)
- Add another coat, if you want. Sometimes it takes a 2nd to cover any spots you may have missed or to get a good base on larger pieces.
- After the paint is dry, write your message on the votive. Voila!
Custom Colors How-To
Start with flat-finish latex paint in any shade. For small areas, such as a door panel, mix 1 cup at a time.
1. Pour 1 cup of paint into a container. Add 2 tablespoons of unsanded tile grout. Mix with a paint stirrer, carefully breaking up clumps.
2. Apply paint with a roller or a sponge paintbrush to a primed or painted surface. Work in small sections, going over the same spot several times to ensure full, even coverage. Let dry.
3. Smooth area with 150-grit sandpaper, and wipe off dust.
4. To condition: Rub the side of a piece of chalk over entire surface. Wipe away residue with a barely damp sponge.
The Floaty Butterflies (pictured above) from Martha just screams spring! I absolutely love them. This would definitely be a conversation piece. Well, I know I wouldn't be able to stop talking about them.Tools and Materials
Spray adhesive
Decorative paper
Card stock
Template
Pencil
Scissors
Floaty Butterflies How-To
1. Spray-mount paper onto card stock or paper that's colored on both sides; fold in half. Place butterfly template on paper with flat edge of butterfly's body flush against fold; trace.
2. Cut out butterfly along inside of the traced line and cut out V-shaped notch along the folded edge. Open slightly. Slip notch over rim of glass to hold butterfly in place.
Don't forget the Butterfly Template.
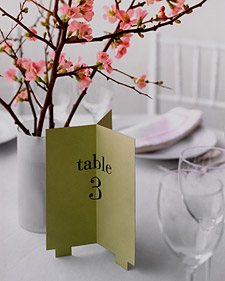
This idea from Martha Stewart, I thought was great. This Trifold Table Number is created so it can be seen from all angles. Really, how many times have you been to a reception and had a little trouble finding your seat because the number was faced in an odd direction. I know I have. Here's how to make it.
1. To make it, use a computer to print numbers onto pieces of colored cover stock (or have numbers calligraphed).
2. Trim the papers to 6 by 7 1/2 inches. For the feet, cut 1/2-inch squares from both corners on bottom edge.
3. Measure over 1 inch for each foot, and mark.
4. Cut out a 3-by-1/2-inch strip between marks.
5. Crease each sheet down the middle, and join the 3 pieces with rubber cement.
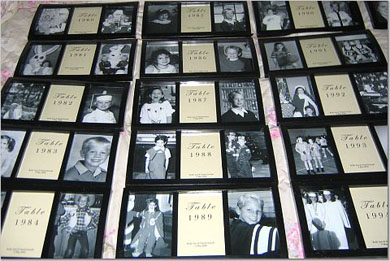
Last but not least is the personalized table numbers. This great idea was posted by Kelly on the Weddingbee. Each table was numbered based on a year in the bride and groom's life, with a picture of them during that year. What a great idea to allow your guests to walk down memory lane with you as they see how each of you grew up. This will definitely get your guests talking and laughing.
Remember you can use photos of your pets, places you've visited together, any of your favorite things and even your engagement photos. Be creative. Remember your guests will remember and appreciate the little touches.


1 comment:
i love the chalkboard candles! What a cute way to personalize your wedding!
Post a Comment